
Journals445
Newest
Follow me elsewhere!
1 min read
Hello everyone! its been so long! I hope everyone has been creating art still! Come follow me where I am active ![]()
Twitter!: https://twitter.com/BixelPantry
IG! : https://www.instagram.com/BixelPantry/ Hope to see you there! <3
Join the community to add your comment. Already a deviant? Log In
Favorites Feature
7 min read
Decided to feature some of my favorite Deviations from over the past week or so  (Smile)")
![SC ARPG | Glubglub Passport [Shellie] by Sugary-Stardust](https://images-wixmp-ed30a86b8c4ca887773594c2.wixmp.com/f/dd392618-679a-4fca-88cd-844f27748720/dda53rj-52f6857a-b54c-46bc-badc-506cc7fe1a26.png/v1/fit/w_150,h_150,q_70,strp/sc_arpg___glubglub_passport__shellie__by_sugary_stardust_dda53rj-150.jpg?token=eyJ0eXAiOiJKV1QiLCJhbGciOiJIUzI1NiJ9.eyJzdWIiOiJ1cm46YXBwOjdlMGQxODg5ODIyNjQzNzNhNWYwZDQxNWVhMGQyNmUwIiwiaXNzIjoidXJuOmFwcDo3ZTBkMTg4OTgyMjY0MzczYTVmMGQ0MTVlYTBkMjZlMCIsIm9iaiI6W1t7ImhlaWdodCI6Ijw9NTAwIiwicGF0aCI6IlwvZlwvZGQzOTI2MTgtNjc5YS00ZmNhLTg4Y2QtODQ0ZjI3NzQ4NzIwXC9kZGE1M3JqLTUyZjY4NTdhLWI1NGMtNDZiYy1iYWRjLTUwNmNjN2ZlMWEyNi5wbmciLCJ3aWR0aCI6Ijw9MTUwMCJ9XV0sImF1ZCI6WyJ1cm46c2VydmljZTppbWFnZS5vcGVyYXRpb25zIl19.XvSx2pkj18FETH_v_oPhYLJKDDhAlxeSqH5PvK-Zh1Q)
Really cute underwater scene done by Sugary-Stardust of their GlubGlub!


Wonderful message by duckie-dreamland

I cold feature so man pieces by YuukiMokuya but these lovely fellas are my fav recently

Absolutely stunning painting by my friend NasikaSakura

So cute creature by cucoa

Open Adoptable by celestialsunberry that I love but cannot afford haha
<da:thumb id="802541689"/>
Such a cute scene by Kuqqiz of some characters made by douceur

Such sweet kitties ^^ by pockylog
Last but not least one of my fav open adoptables by McDolly that i also cant afford xD
Really cute underwater scene done by Sugary-Stardust of their GlubGlub!
Wonderful message by duckie-dreamland
I cold feature so man pieces by YuukiMokuya but these lovely fellas are my fav recently
Absolutely stunning painting by my friend NasikaSakura
So cute creature by cucoa
Open Adoptable by celestialsunberry that I love but cannot afford haha
<da:thumb id="802541689"/>
Such a cute scene by Kuqqiz of some characters made by douceur
Such sweet kitties ^^ by pockylog
Last but not least one of my fav open adoptables by McDolly that i also cant afford xD
Join the community to add your comment. Already a deviant? Log In
Pixel Commission Info
9 min read
Prices are in USD
Animation Costs EXTRA, please inquire
Basic Animation
Blinking : + $1.00Floating : + $0.50
Sparkles : +$1.50
less than 50x50px
$2-$350x50px
$4-$5


MORE
50x50px-100x100px
$8-$10


100x100px+
12$+ (please inquire)
Dividers
$7+
-------------------------------------
ANIMATION
Animation cost depends mostly on how many individual frames will have to be drawn.DEALS
Purchase larger images with multiple objects/items and I'll give you a deal!Buy matching pixels and I'll give you a deal! (matching avatar+divider etc)
Join the community to add your comment. Already a deviant? Log In
To Do:
1 min read
Commissions:
Dreamyko payed (Swing-a-ling x5)
taugeeee payed (Swing-a-ling)
ContrastParadox800 needs to pay (Swing-a-ling x2) - contacted twice")
HOLD
haruihime (Swing-a-ling)
Cydnee-B (Swing-a-ling)
mishiiemoo (Swing-a-ling)
SugaryDolly (Swing-a-ling)
nekomancyy (Swing-a-ling)
lacedwithloves (Swing-a-ling)
Dreamyko payed (Swing-a-ling x5)
taugeeee payed (Swing-a-ling)
ContrastParadox800 needs to pay (Swing-a-ling x2) - contacted twice
HOLD
haruihime (Swing-a-ling)
Cydnee-B (Swing-a-ling)
mishiiemoo (Swing-a-ling)
SugaryDolly (Swing-a-ling)
nekomancyy (Swing-a-ling)
lacedwithloves (Swing-a-ling)
Join the community to add your comment. Already a deviant? Log In
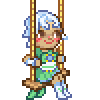
Swing-a-ling Avatars $5 : CLOSED
9 min read


Join the community to add your comment. Already a deviant? Log In